MicroStrategy对接FusionInsight
适用场景
MicroStrategy 11.1.4 ↔ FusionInsight HD 6.5 (Hive/Spark2x)
MicroStrategy 11.1.4 ↔ FusionInsight MRS 8.0 (Hive/Spark2x)
简介
MicroStrategy Desktop是一款功能强大的数据发现工具。使用MicroStrategy Desktop来创建自定义的交互式达析报告,用于探索您的业务数据。您可从许多不同的来源导入业务数据,包括本地文件、数据库等。
本文档主要描述在Window操作系统,MicroStrategy Desktop通过Fiber方式对接FusionInsight HD的Hive、Spark2x组件。
准备工作
-
登录FusionInsight Manager创建一个“人机”用户,例如:developuser,具体请参见FusionInsight HD产品文档的
管理员指南->系统设置->权限设置->用户管理->创建用户章节。给developuser用户授予所有访问权限,包含但不限于Hive、Spark2x。 -
已完成FusionInsight HD客户端安装,具体请参见FusionInsight HD产品文档的
应用开发指南->安全模式->安全认证->配置客户端文件章节。 -
(重要)完成MIT KERBEROS认证,具体参见usionInsight HD产品文档的
应用开发指南->安全模式->Hive开发指南->环境准备->配置ODBC样例工程->Windows环境章节。 -
已将集群的节点主机名与IP的映射关系加入到windows的hosts文件中
C:\Windows\System32\drivers\etc\hosts。 -
客户端机器的时间与FusionInsight HD集群的时间要保持一致,时间差小于5分钟。
-
Windows上已经安装好jdk1.8或者以上版本,并完成jdk环境变量配置。
-
Hive数据库已存在表student,可使用beeline客户端创建:
示例如下:
CREATE TABLE IF NOT EXISTS student(id INT, first_name STRING, last_name STRING, subject_id INT, score FLOAT);
INSERT INTO student VALUES (1,'Tom','Zhang',1,80);
INSERT INTO student VALUES (2,'Sandy','Li',2,75);
INSERT INTO student VALUES (3,'Benny','Chow',3,76);
INSERT INTO student VALUES (4,'Tina','Wang',1,60);
INSERT INTO student VALUES (5,'Tracy','Zhang',1,80);
INSERT INTO student VALUES (6,'Andy','Li',2,79);
INSERT INTO student VALUES (7,'Manson','Chow',3,86);
INSERT INTO student VALUES (8,'Aurora','Wang',1,90);
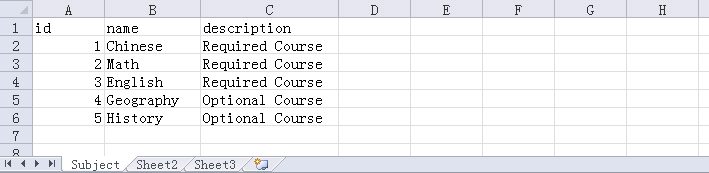
- 本地已存在Subject.xlsx,内容如下所示:
Fiber认证方式配置
操作场景
Fiber的安全认证有kinit和keytab两种方式。本文使用keytab方式。具体参数配置说明可参考FusionInsight HD产品文档的业务操作指南->统一SQL(Fiber)->客户端配置章节。
前提条件
-
已完成准备工作。
-
将FusionInsight HD客户端的Fiber、Hive、Spark2x客户端文件夹,拷贝至本地新建目录
C:\ecotesting。假设FusionInsight HD客户端安装于/opt/hadoopclient目录,则: -
将
/opt/hadoopclient/Fiber拷贝至本地C:\ecotesting目录。 -
将
/opt/hadoopclient/Hive拷贝至本地C:\ecotesting\Fiber目录。 -
将
/opt/hadoopclient/Spark2x拷贝至本地C:\ecotesting\Fiber目录。
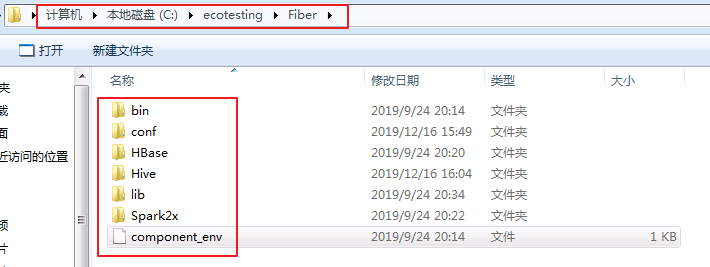
- 登录FusionInsight Manager的
系统->用户->更多(developuser)->下载认证凭证,下载developuser对应的认证凭证。将用户的 krb5.conf 和 user.keytab 文件拷贝到C:\ecotesting\Fiber\conf目录下。
操作步骤 ~ keytab认证方式配置
-
在
C:\ecotesting\Fiber\conf目录下新建 jaas.conf 文件,示例如下:Client { com.sun.security.auth.module.Krb5LoginModule required useKeyTab=true keyTab="C:\\ecotesting\\Fiber\\conf\\user.keytab" principal="developuser" useTicketCache=false storeKey=true debug=true; }; -
修改配置文件
C:\ecotesting\Fiber\conf\fiber.xml。
Hive的JDBC配置示例:
<jdbc>
  <identify>hive</identify>
  <describe>hive jdbc configuration</describe>
  <driverClass>org.apache.hive.jdbc.HiveDriver</driverClass>
  <securityClass>com.huawei.fiber.DefaultAuthenticationCallback</securityClass>
  <classPath>C:\\ecotesting\\Fiber\\Hive\\config;C:\\ecotesting\\Fiber\\Hive\\Beeline\\lib;C:\\ecotesting\\Fiber\\Hive\\Beeline\\conf</classPath>
  <jdbcUrl>jdbc:hive2://172.16.4.21:24002,172.16.4.22:24002,172.16.4.23:24002/;serviceDiscoveryMode=zooKeeper;zooKeeperNamespace=hiveserver2;sasl.qop=auth-conf;auth=KERBEROS;principal=hive/hadoop.hadoop.com@HADOOP.COM;user.principal=developuser;user.keytab=C:/ecotesting/Fiber/conf/user.keytab</jdbcUrl>
   <properties>
    <property>
      <name>java.security.krb5.conf</name>
      <value>C:\\ecotesting\\Fiber\\conf\\krb5.conf</value>
    </property>
    <property>
      <name>java.security.auth.login.config</name>
      <value>C:\\ecotesting\\Fiber\\conf\\jaas.conf</value>
    </property>
    <property>
      <name>zookeeper.server.principal</name>
      <value>zookeeper/hadoop.hadoop.com</value>
    </property>
  </properties>
</jdbc>
Spark2x的JDBC配置示例:
<jdbc>
  <identify>Spark2x</identify>
  <describe>Spark2x jdbc configuration</describe>
  <driverClass>org.apache.hive.jdbc.HiveDriver</driverClass>
  <securityClass>com.huawei.fiber.DefaultAuthenticationCallback</securityClass>
  <classPath>C:\\ecotesting\\Fiber\\Spark2x\\spark\\conf;C:\\ecotesting\\Fiber\\Spark2x\\spark\\jars</classPath>
  <jdbcUrl>jdbc:hive2://172.16.4.21:24002,172.16.4.22:24002,172.16.4.23:24002/;serviceDiscoveryMode=zooKeeper;zooKeeperNamespace=sparkthriftserver2x;saslQop=auth-conf;auth=KERBEROS;principal=spark2x/hadoop.hadoop.com@HADOOP.COM;user.principal=developuser;user.keytab=C:/ecotesting/Fiber/conf/user.keytab</jdbcUrl>
  <properties>
  <property>
    <name>java.security.krb5.conf</name>
    <value>C:\\ecotesting\\Fiber\\conf\\krb5.conf</value>
  </property>
  <property>
    <name>java.security.auth.login.config</name>
    <value>C:\\ecotesting\\Fiber\\conf\\jaas.conf</value>
  </property>
  <property>
    <name>zookeeper.server.principal</name>
    <value>zookeeper/hadoop.hadoop.com</value>
  </property>
  </properties>
</jdbc>
MicroStrategy Desktop对接Fiber
操作场景
MicroStrategy Desktop通过Fiber方式对接FusionInsight的Hive、Spark2x组件。
前提条件
- 从https://www.microstrategy.com/us/get-started/desktop下载MicroStrategy Desktop软件,并完成安装。
操作步骤
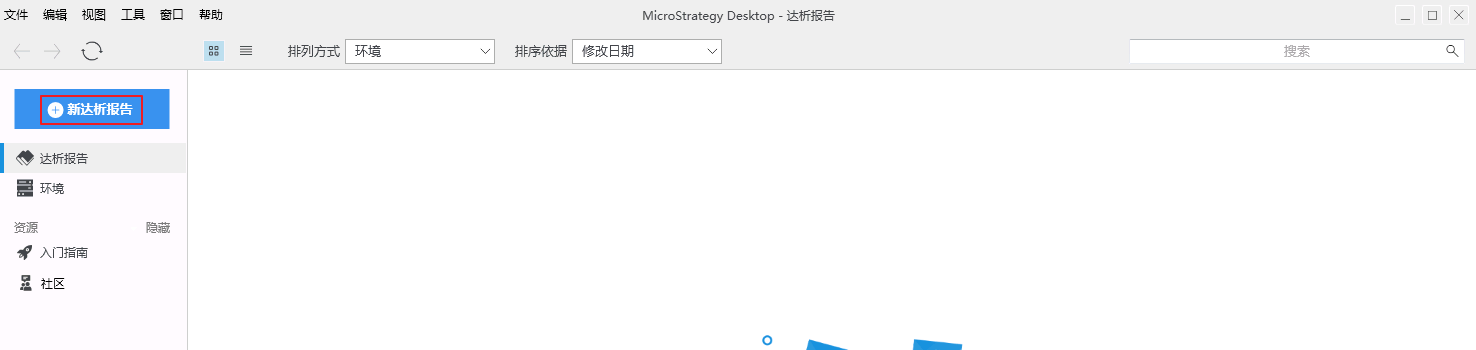
- 打开MicroStrategy Desktop界面,点击 新达析报告。
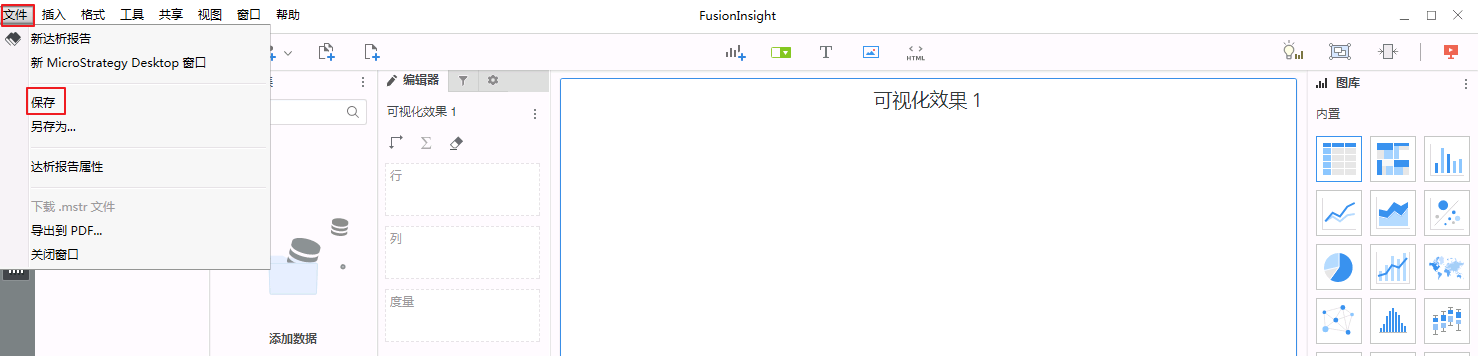
- 点击“达析报告”界面的菜单栏 文件->保存 将报告保存为 FusionInsight.mstr。
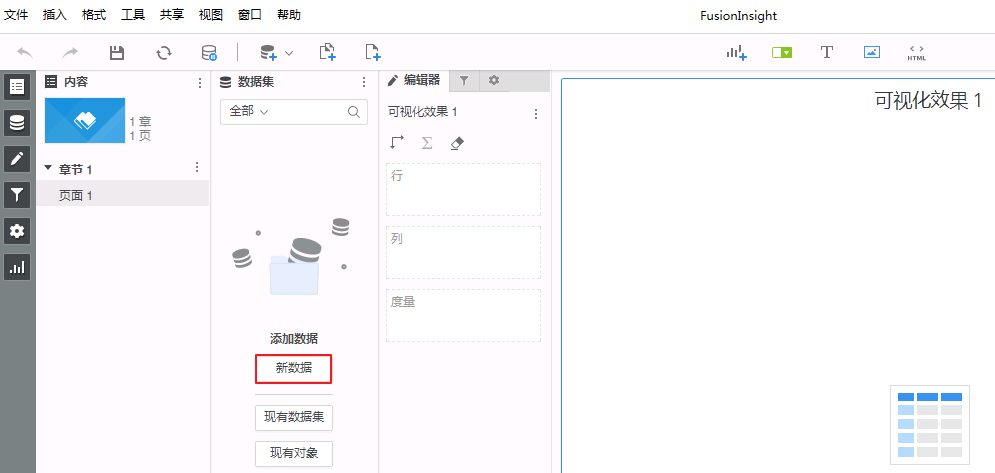
- 点击达析报告“FusionInsight”界面的 新数据 按钮添加数据。
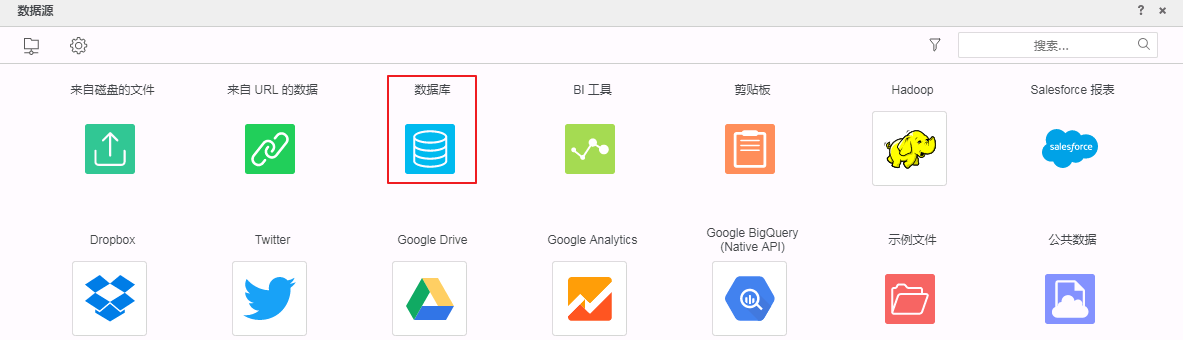
- 在数据源中选择 数据库。
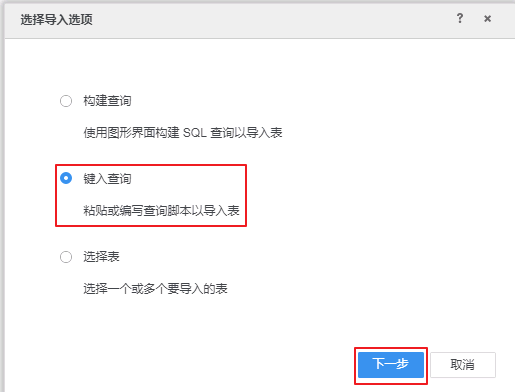
- 导入选项选择 键入查询,点击 下一步。
- 点击“+”按钮增加数据源。

- 勾选 无需DSN的数据源,点击 显示连接字符串 并 编辑连接字符串。填写连接信息后点击 保存。
Hive的连接信息示例如下:
数 据 库:Generic
版    本:Generic DBMS
驱动程序:默认,不影响连接
连 接 串:JDBC;DRIVER={com.huawei.fiber.FiberDriver};MSTR_JDBC_JAR_FOLDER=C:\ecotesting\Fiber\lib;URL={jdbc:fiber://fiberconfig=C:\ecotesting\Fiber\conf\fiber.xml;defaultDriver=hive};
用     户:不能为空,但是不用于连接验证,随意写,例如“A”
密     码:不能为空,但是不用于连接验证,随意写,例如“test”
数据源名称:fi_fiber_hive_jdbc,可自定义
Spark2x的连接信息示例如下:
数 据 库:Generic
版    本:Generic DBMS
驱动程序:默认,不影响连接
连 接 串:JDBC;DRIVER={com.huawei.fiber.FiberDriver};MSTR_JDBC_JAR_FOLDER=C:\ecotesting\Fiber\lib;URL={jdbc:fiber://fiberconfig=C:\ecotesting\Fiber\conf\fiber.xml;defaultDriver=spark2x};
用     户:不能为空,但是不用于连接验证,随意写,例如“A”
密     码:不能为空,但是不用于连接验证,随意写,例如“test”
数据源名称:fi_fiber_spark2x_jdbc,可自定义
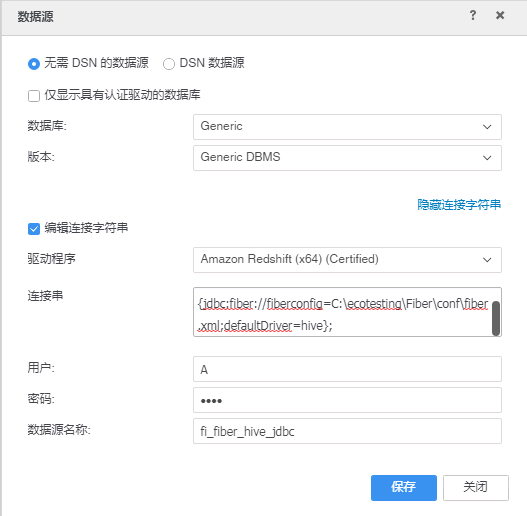
说明:
上面截图显示的是对接Hive的连接信息。
连接信息中,主要是“连接串”信息影响是否能连接成功,其他信息不影响。
Hive、Spark2x连接信息的唯一区别在于defaultDrive的取值。
-
以下指导步骤以Hive为例,Spark2x类似。
-
单击数据源 fi_fiber_hive_jdbc,连接成功则返回FusionInsight的所有命名空间。
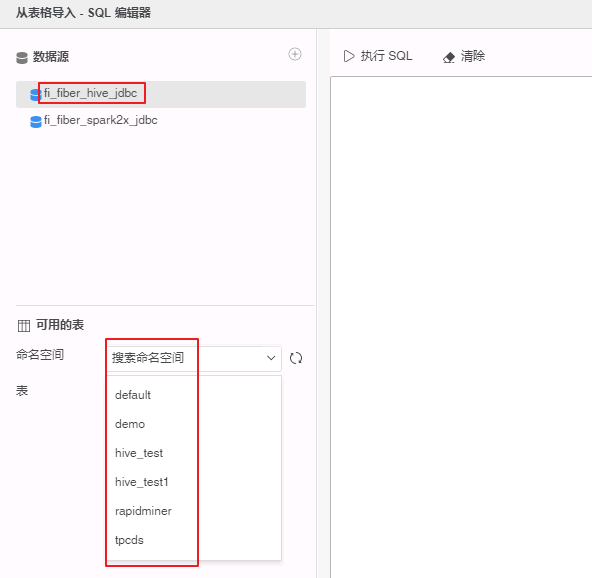
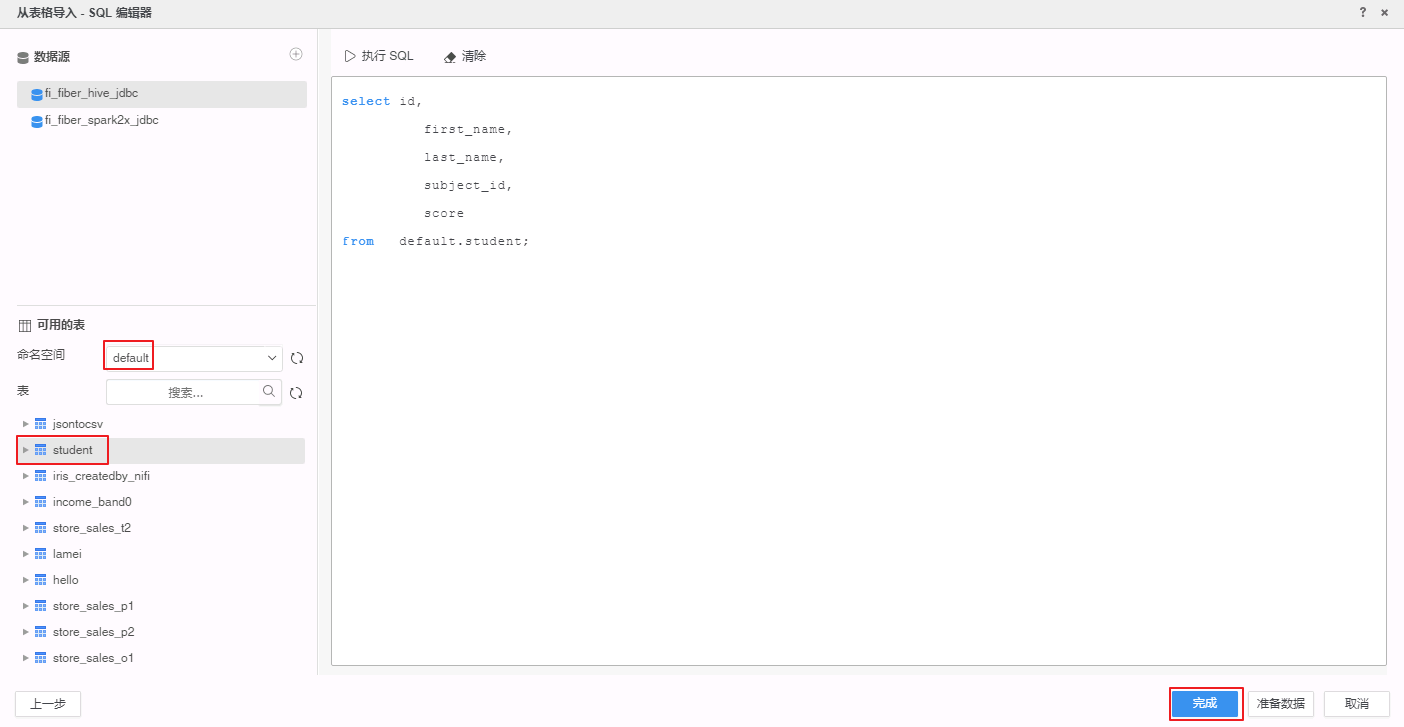
- 选择表Student存在的命名空间 default,双击表 Student,点击 完成。
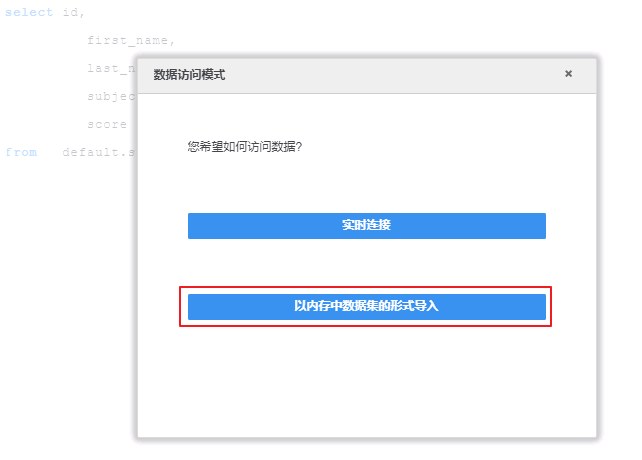
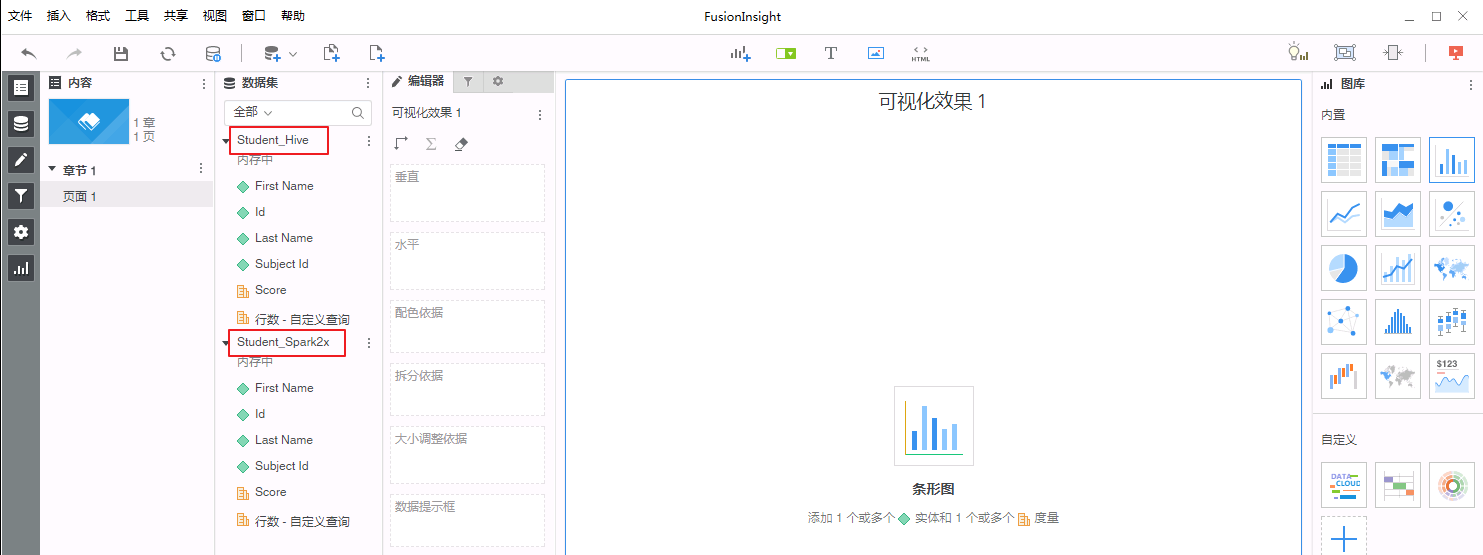
- 选择 以内存中数据集的形式导入。
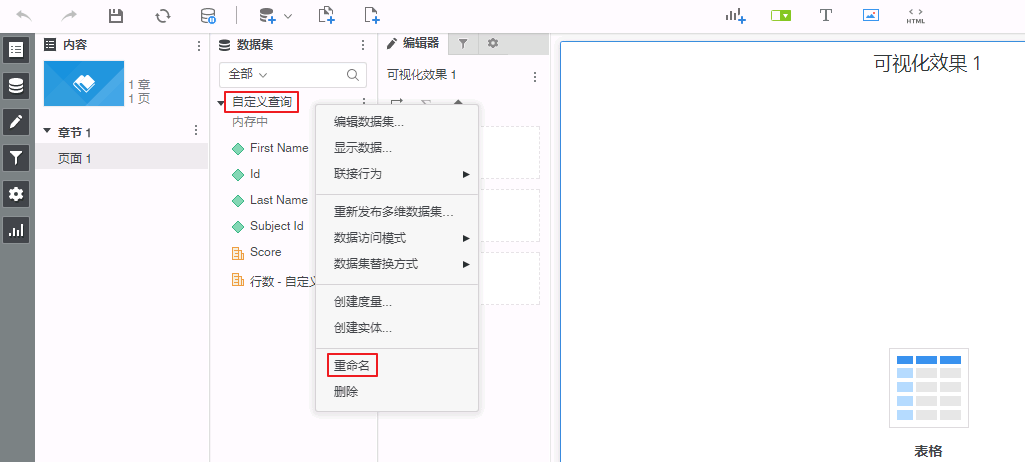
- 右击 自定义查询,选择 重命名 为 “Student_Hive”。从Spark2x导入的查询重命名为 “Student_Spark2x”。
MicroStrategy Desktop编辑数据
操作场景
使用MicroStrategy Desktop合并从Hive/Spark、Excel导入的多个数据源,输出报表。以下以合并Hive和Excel数据源为例,统计Student各个科目成绩的平均值、最小值、最大值。合并Spark2x和Excel数据源操作类似。
前提条件
- MicroStrategy Desktop成功对接FusionInsight HD的Hive、Spark2x组件并已从Hive或者Sparkx导入表“Student”的数据到MicroStrategy Desktop。
操作步骤
-
导入Excel数据源。
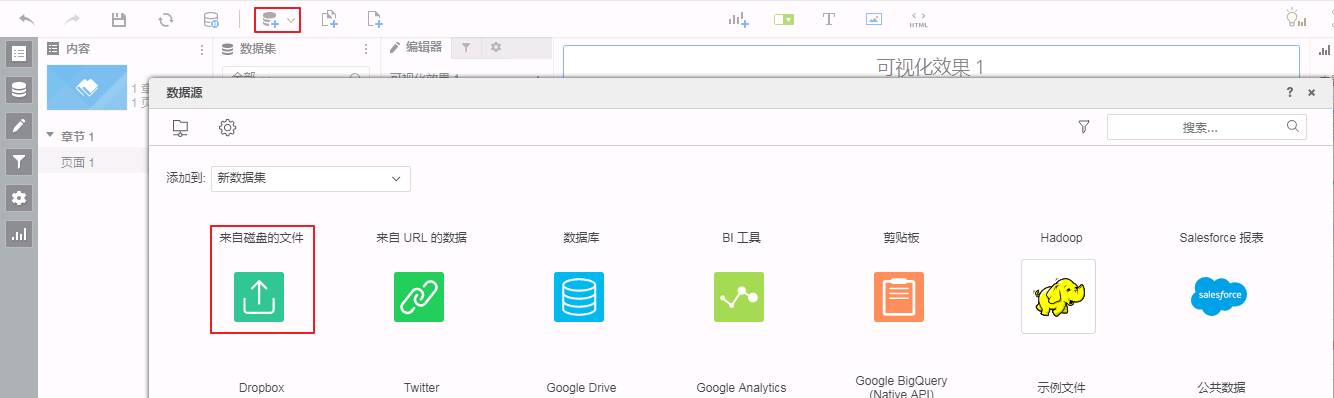
-
点击达析报告“FusionInsight”界面的 添加数据 按钮选择 新建数据。在数据源中选择 来自磁盘的文件。
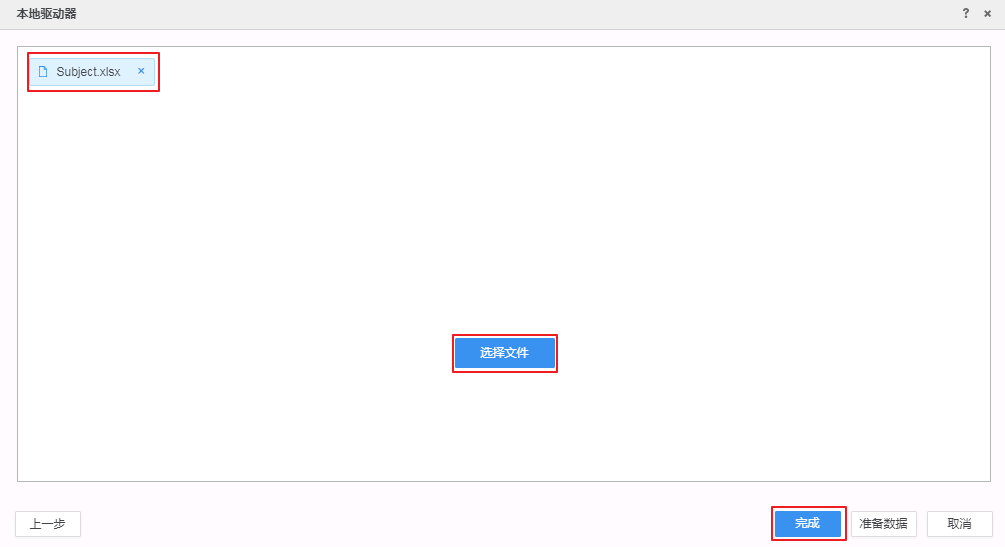
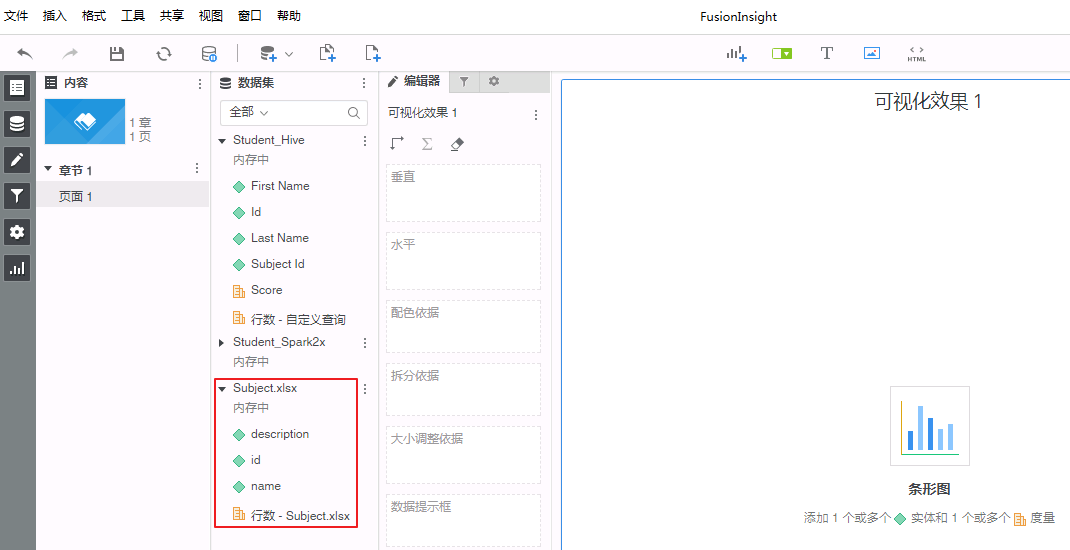
-
点击 选择文件 选择本地文件 Subject.xlsx,点击 完成。
-
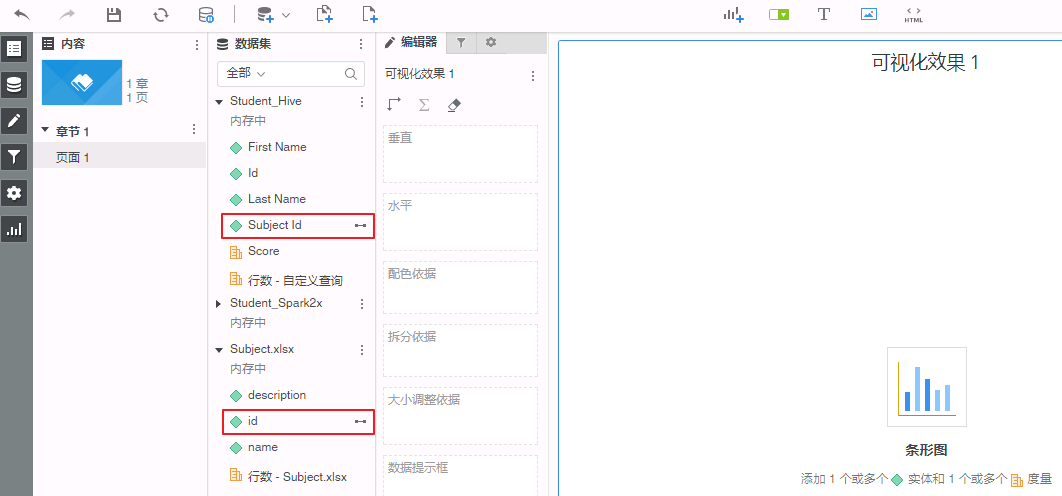
建立两个数据源的链接。“Student_Hive”的“Subject_id”链接到“Subject.xlsx”的“id”。
-
右键“Student_Hive”的 Subject_id 选择 链接到其他数据集。
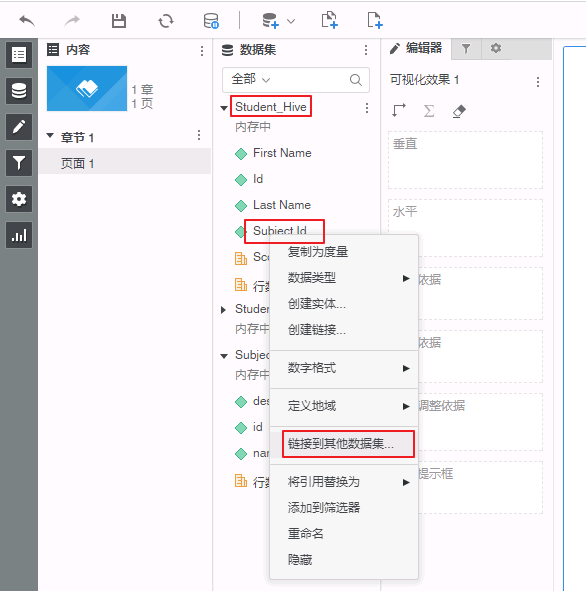
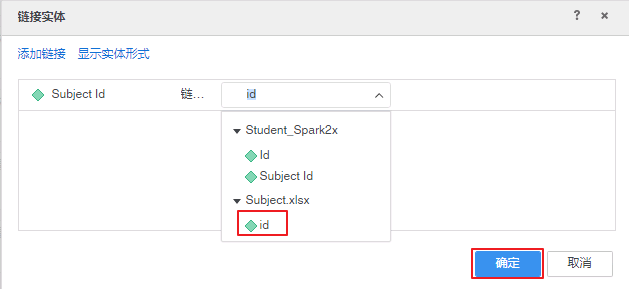
-
选择“Subject.xlsx”的 id,点击 确定。
-
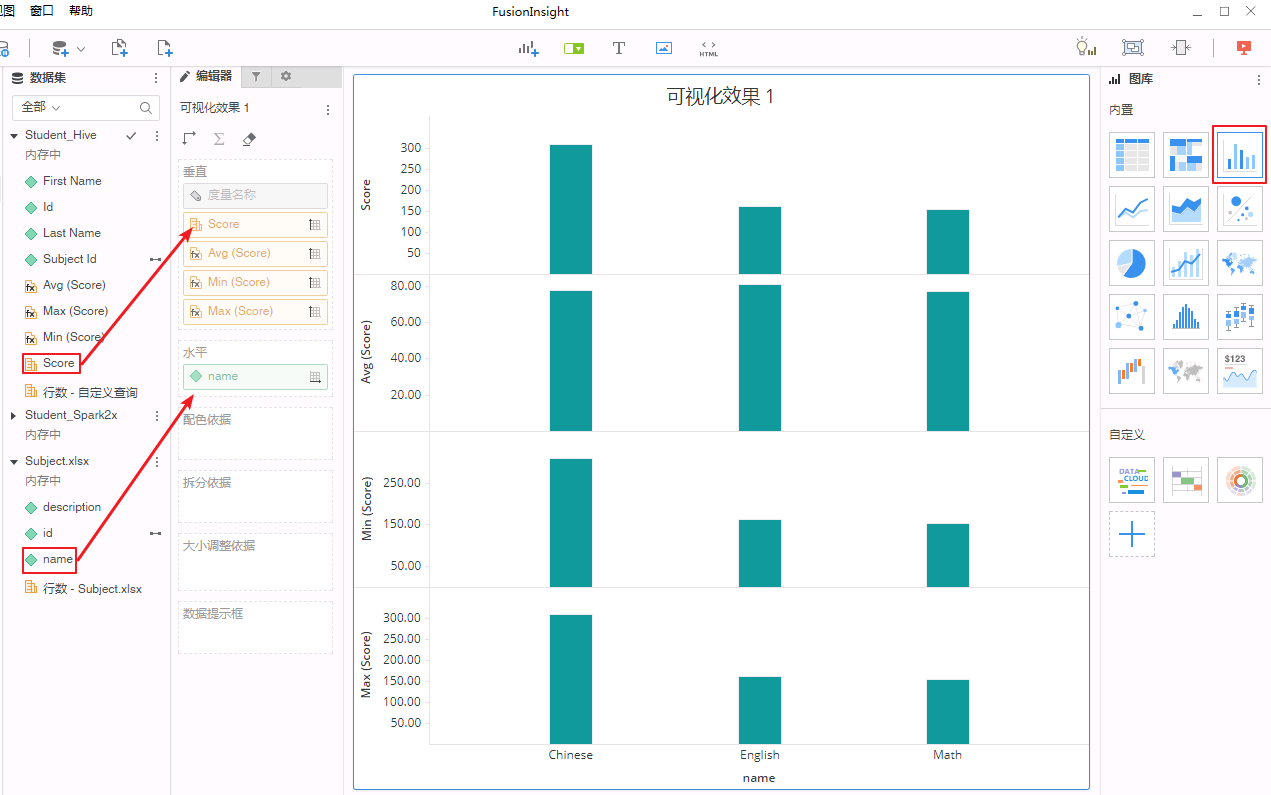
在右侧“图库”中选择 条形图,将“Student_Hive”的 Score 拖曳至“垂直”框中,将“Subject.xlsx”的 name 拖曳至“水平”框中。右键“垂直”框中的 Score 分别选择 聚合依据->平均、聚合依据->最小、聚合依据->最大。则图表的可视化效果如下图所示:
FAQ
-
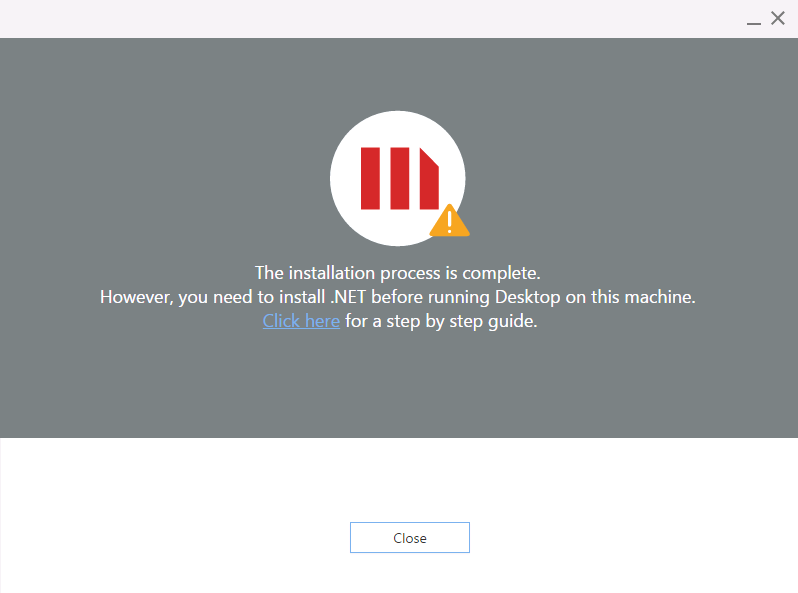
安装完MicroStrategy Desktop后,提示使用前需要安装.NET。
【问题描述】
安装完MicroStrategy Desktop后,提示“The installation process is complete. However, you need to install .NET before running Desktop on this machine. Click here for a step by step guide.”。
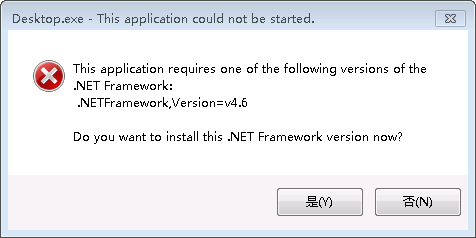
如果没安装.NET直接启动MicroStrategy Desktop则会返回“This application requires one of the following versions of the .NET Framework”
【解决方法】
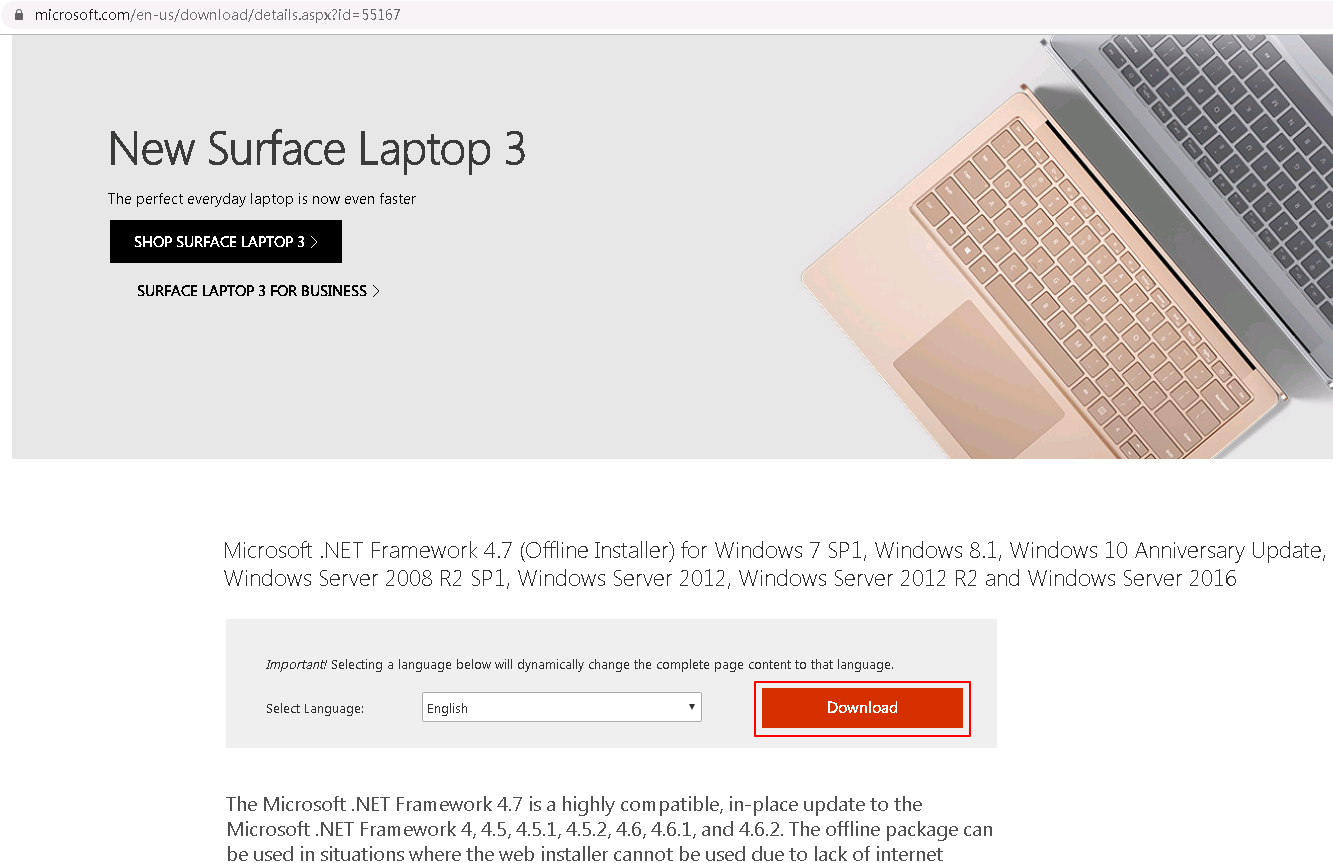
- 点击提示信息的 Click here 跳转至“Microsoft .NET Framework 4.7”的下载界面https://www.microsoft.com/en-us/download/details.aspx?id=55167,点击 Download 按钮下载 NDP47-KB3186497-x86-x64-AllOS-ENU.exe。
- 安装 NDP47-KB3186497-x86-x64-AllOS-ENU.exe。安装的过程中,如果提示“Setup cannot continue because a dependent update needs to be installed before you can install this product on Windows 7, Windows Server 2008 R2, Windows 8 or Windows Server 2012.”
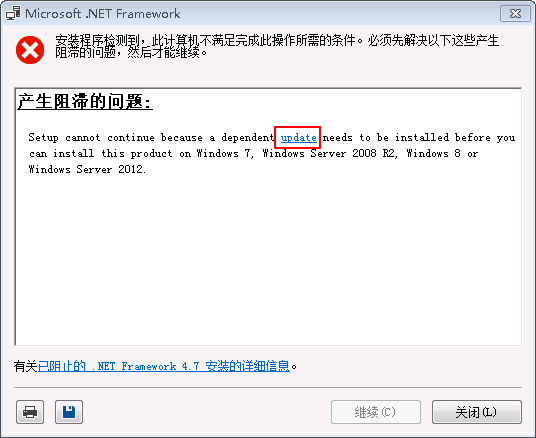
- 点击提示信息中的 update 跳转至https://support.microsoft.com/zh-cn/help/4020302/the-net-framework-4-7-installation-is-blocked-on-windows-7-windows-ser,在该页面的“解决方法”中,根据操作系统的版本下载并安装对应版本的d3dcompiler更新。

- Window 7 64位操作系统下载并安装 Windows6.1-KB4019990-x64.msu 后,再重新安装 NDP47-KB3186497-x86-x64-AllOS-ENU.exe。之后则可以成功启动MicroStrategy Desktop。